Showing posts with label sides. Show all posts

Monday, November 12, 2012

Amy's Sweet Green Chili Rice


One of my favorite classroom parents EVER shared this delish rice recipe with me-- and it changed my life! Haha. But, really...It's so good that I decided to name it after her! Usually I do not really like Mexican-style rice because it tends to be so dry and flavorless. Amy's rice is moist and FULL of flavor. I think I've made it twice a week since she shared the recipe with me! Try it as a side dish, on a taco, in a burrito, etc. You won't be disappointed!

Amy, you are one of the sweetest people I know. I feel blessed to know you and more than that, I feel honored to have had your sweet baby girl in my class! Thank you for this delicious recipe!

Ingredients:
- 2 cups of minute rice
- 2 cups of chicken broth
- 1 garlic pod, minced
- 1/2 small onion, diced
- zest of 1 lime
- juice of 1/2 lime
- 1 chicken bouillon cube
- 1 tablespoon of sugar
- 4 ounces of diced green chilies
- 1/4 to 1/2 cup of frozen mixed veggies, depending on how much you want (I use the carrots, peas, corn, green beans mix)
- dash of olive oil, salt and pepper

Directions:
1) Saute onion and garlic in olive oil until onion is soft.
2) Add remaining ingredients, except rice, and bring to a boil.
3) After it comes to a boil, add rice and stir well. Turn heat off and cover. Leave covered for 10 minutes.
4) Remove lid, stir, serve immediately. Voila!

  Get Cookin'!

Sunday, June 24, 2012

Asian Noodle Salad


This recipe is from the Pioneer Woman but I found it on Pinterest, of course! It is really delicious and the perfect summer lunch. It's a cold pasta salad with an Asian flare made with a ton of veggies. You can really use whatever veggies you like. I used most everything she did, but I left out the spinach, cashews, and bean sprouts. Her recipe calls for linguine noodles. I think next time I will use macaroni or shells. I loved this salad but eating linguine noodles cold (and without pasta sauce) felt weird to me. This recipe makes a huge bowl full so you can eat it for many days!

Salad Ingredients:
- 1/2 a package of pasta noodles cooked, rinsed and cooled (whichever kind you prefer)
- purple cabbage (I used the kind already washed and cut in the bag)
- 1 yellow bell pepper
- 1 red bell pepper
- 1 orange bell pepper
- 1 bunch of cilantro
- 1 bunch of green onions
- 1 cucumber
- I also some broccoli slaw (found by the shredded cabbage and coleslaw mix in the grocery store)

Dressing Ingredients:
- 1 whole lime, juiced
- 8 tablespoons of olive oil
- 8 tablespoons of soy sauce
- 2 or 3 tablespoons of sesame oil (found on the Asian isle in the store)
- 1/3 cup of brown sugar
- 3 tablespoons of fresh ginger, chopped ( I just used a grater and minced it instead of chopping it)
- 2 cloves of garlic, chopped
- 1 whole jalapeno pepper, chopped
- cilantro

Directions:
1) The first thing you need to do (after boiling, rinsing, and cooling noodles) is get all the veggies chopped up. This is what takes the longest.
2) Once everything is chopped up, mix the salad ingredients together.
3) In a separate bowl, whisk together the dressing ingredients. I think I used less olive oil and more soy sauce and sesame oil. I like a lot of dressing on my salad, so I added a little more of everything.
4) Mix the salad and dressing together with tongs or hands and serve.
5) Voila!

*Note: I made this during the school year and brought it for lunch for a whole week! This recipe really makes alot. And it keeps really well in the fridge. Enjoy!

  Get Cookin'!

Saturday, June 16, 2012

The Best Cornbread Ever


This recipe is literally the easiest and most delicious cornbread I've ever tasted! It's supposedly a mock recipe of Boston Market's cornbread. If you've ever eaten at Z'Tejas, it tastes very similar to their skillet cornbread. Melt in your mouth! It's the perfect combination of sweetness and corn.

Ingredients for an 8 in round pan:
- 1 box of Jiffy cornbread mix
- 1 box of Jiffy yellow cake mix

Ingredients for 9x13 pan:
- 2 boxes of Jiffy cornbread mix
- 1 regular yellow cake mix (the normal Betty Crocker size, not Jiffy)

Directions:
Simply mix both boxes according to the directions and combine the batter. You can use a large mixing bowl and combine both boxes of mix and all other ingredients at once. Bake at 350 degrees until done, about 30 minutes. Yum!

  Get Cookin'!

Saturday, March 3, 2012

Grilled Cabbage


This seemed really interesting to me so I had to try it. Surprisingly it was SO good! Jason does not each cabbage and he loved it. We could not believe how flavorful this was- really! And super simple. Until now I had never, ever, ever cooked cabbage. I had more than my share of smothered cabbage as a child (thanks, Mom!) haha. But I will cook this again very soon. Try it-- you'll be surprised by how delish it is!

All you do is cut one head of cabbage into 4 pieces. Drizzle a little bit of melted butter and olive oil on top. Then sprinkle with salt, pepper, and a dash of Italian seasonings. Top with a piece of raw bacon. Put  each piece of cabbage in a piece of foil and then cover tightly with another piece of foil (to make like a little pouch). Grill over medium heat for about 25-30 minutes. Voila!  

  Get Cookin'!

Monday, February 27, 2012

Cajun Remoulade Sauce


Remoulade is a Louisiana style sauce that is meant for seafood. It usually starts with a mayo base and then lots of other things are added to make a reddish sauce that is tart, creamy, and spicy. I feel like I've tasted 100 different sauces in my lifetime, all claiming to be some sort of a remoulade. Some have been wonderful and some have been not-so-great. I decided to try to make one of my own by combining a few recipes I found online. This one was good, but not great. It needs some refining but the basic structure is there. Here it is! Try it and see what you think.

Ingredients:
- 1 cup of mayonnaise
- 2 tablespoons of Dijon mustard
- 1 tablespoon of freshly squeezed lemon juice
- 1 tablespoon of finely chopped flat-leaf parsley
- 1 tablespoon of Tabasco
- 2 cloves of garlic, minced
- 1 teaspoon of worcestershire sauce
- 1 teaspoon of paprika
- 1/4 teaspoon of kosher salt
- 1/8 teaspoon of cayenne pepper

Directions:
Mix everything together and then let sit for 1 hour so the flavors can combine. Store in the refrigerator.

  Get Cookin'!

Monday, February 6, 2012

Grilled Avocados


I skipped Crock Pot Monday this week because of the Super Bowl...I just didn't get to the store! So I thought I'd share a simple and easy favorite of mine. This is so quick and SO good! I thought that grilling an avocado would make it mushy but it doesn't. But you have to put the olive oil and lime juice; we tried it once without it and the avocado burned. We like to put a dollop of sour cream in the avocado- but a good friend of mine also puts a little salsa on top of the sour cream and she loves it! I will be trying that soon. If you like avocados you will love this! It gives them a whole new taste. Try it and you will see!

Ingredients:
- avocado halves
- lime juice
- olive oil
- salt and pepper

Directions:
1) Cut all the way around the avocado but do not cut through the seed. Once you have cut all the way around, twist the 2 pieces until they come apart. Stab the seed with a knife and trash it.
2) Now you should have 2 avocado halves with the skin still on and a hole where the seed was originally. Sprinkle the halves with olive oil, limes juice, salt and pepper.
3) Grill meat down for 3-5 minutes on about medium heat. Remove when grill lines start to appear.
4) Top with sour cream and enjoy!

  Get Cookin'!

Saturday, December 3, 2011

Bacon Wrapped Green Beans


Another great recipe I found on Pinterest!!! You can view the original recipe here. This recipe seems complicated but it really wasn't too bad.  My favorite part was the sauce that you brush onto the bundles- it was so delish and went perfectly with the flavor of the bacon and green beans. It tasted like something straight out of a fancy restaurant. I will make these for our next dinner guests just to impress them! Any takers?! :-)  

Ingredients:
  • 1 pound of fresh green beans
  • 5-7 strips of bacon
  • 3 teaspoons of melted butter
  • 1/4 cup of brown sugar
  • 1 clove of garlic, minced
  • 1/8 teaspoon of soy sauce
  • seasoning for beans (I used salt, pepper, Greek, and Tony's)
  • toothpicks

Directions:

  1. Boil the green beans in a large pot until tender (but not cooked all the way).
  2. Meanwhile, cook the bacon in the oven- click here for directions. You want the bacon to cook "soft" but not "crispy."
  3. Drain the beans and season them. 
  4. Take a small handful of the beans and wrap a piece of bacon around them. Secure with a toothpick. Continue until all beans are gone.
  5. Melt the butter in a sauce pan. Add the brown sugar, garlic, and soy sauce. Once completely blended, brush other the bundles.
  6. Bake at 400 degrees for about 15 minutes.
  7. Voila!

  Get Cookin'!

Monday, November 7, 2011

Crock Pot Sunday?: Macaroni and Cheese


I have been wanting to try this recipe for so long because Jason loves macaroni and cheese! The only problem is that I cannot make anything in my crock pot during the week that can't be cooked for at least 6-8 hours (because I'm gone all day and have no way to turn it off). This recipe only needs to be cooked in the crock pot for 2 hours- so I decided to try it yesterday.  It was really good! It was very rich and creamy.  I didn't really notice that much difference from Velveeta's Shells and Cheese in the box, but Jason said he could definitely tell the difference. Mac and cheese isn't on my list of favorites so his taste buds are a much better judge.

The only downfall is that this recipe makes a TON. I would definitely cut the recipe in half. Below the full recipe is listed.

Ingredients:
- 16 ounces of elbow macaroni noodles
- 1 can of cheddar cheese soup
- 10 ounces of Velveeta, cubed
- 8 ounces of shredded sharp cheddar cheese
- 1 stick of butter
- 1 tablespoon of salt and pepper (I just put the pepper, no salt)
- 1/2 cup of half-and-half, as needed (I used a little more than this)

Directions:
1) Cook the macaroni noodles for 6-8 minutes, or just until al dente.
2) While pasta is cooking, add soup and Velveeta to the crock pot to warm up.
3) When pasta is done, drain and add to the crock pot.
4) Add the cheddar cheese and butter. Stir all ingredients so that the cheese is evenly distributed.
5) Add seasoning and half-and-half as needed, to keep the pasta moist and prevent it from becoming too sticky.
6) Cook the mac and cheese on low for 2 hours. Do not overcook or the pasta will become mushy. Stir occasionally and add a little half-and-half each time.
7) Voila!

  Get Cookin'!

Thursday, November 3, 2011

Baked Asparagus Fries


Originally this recipe was meant for zucchini spears and I think I will try it with some soon. I just had a bushel of asparagus and thought, "What the heck!? Try it." They were really good! However next time I will look for a bushel with spears that are a little more thick. The asparagus I had were a little thin so they didn't turn out very crispy.

Jason made a delicious teriyaki ranch dipping sauce to go with the asparagus. Delish!

Ingredients:
- a bushel of asparagus or about 1 pound of zucchini
- 1 cup of Italian-seasoned panko bread crumbs (the Japanese style bread crumbs)
- 2 eggs

Directions:
1) Preheat the oven to 425 degrees.
2) Whisk the 2 eggs together in a shallow pie plate and set aside. Put the bread crumbs in another pie plate and set aside.
3) Cut about 1 inch off of the asparagus spears and rinse. Or if you're using zucchini, cut the ends off and the cut them into spears.
4) Dip the spears into the eggs and let excess drip off. Then roll in the bread crumbs and place on a baking sheet. Repeat until all spears are covered.
5) Bake for 10 minutes, remove from oven, flip, and bake for another 10 minutes.
6) Serve immediately. Voila!

  Get Cookin'!

Sunday, September 18, 2011

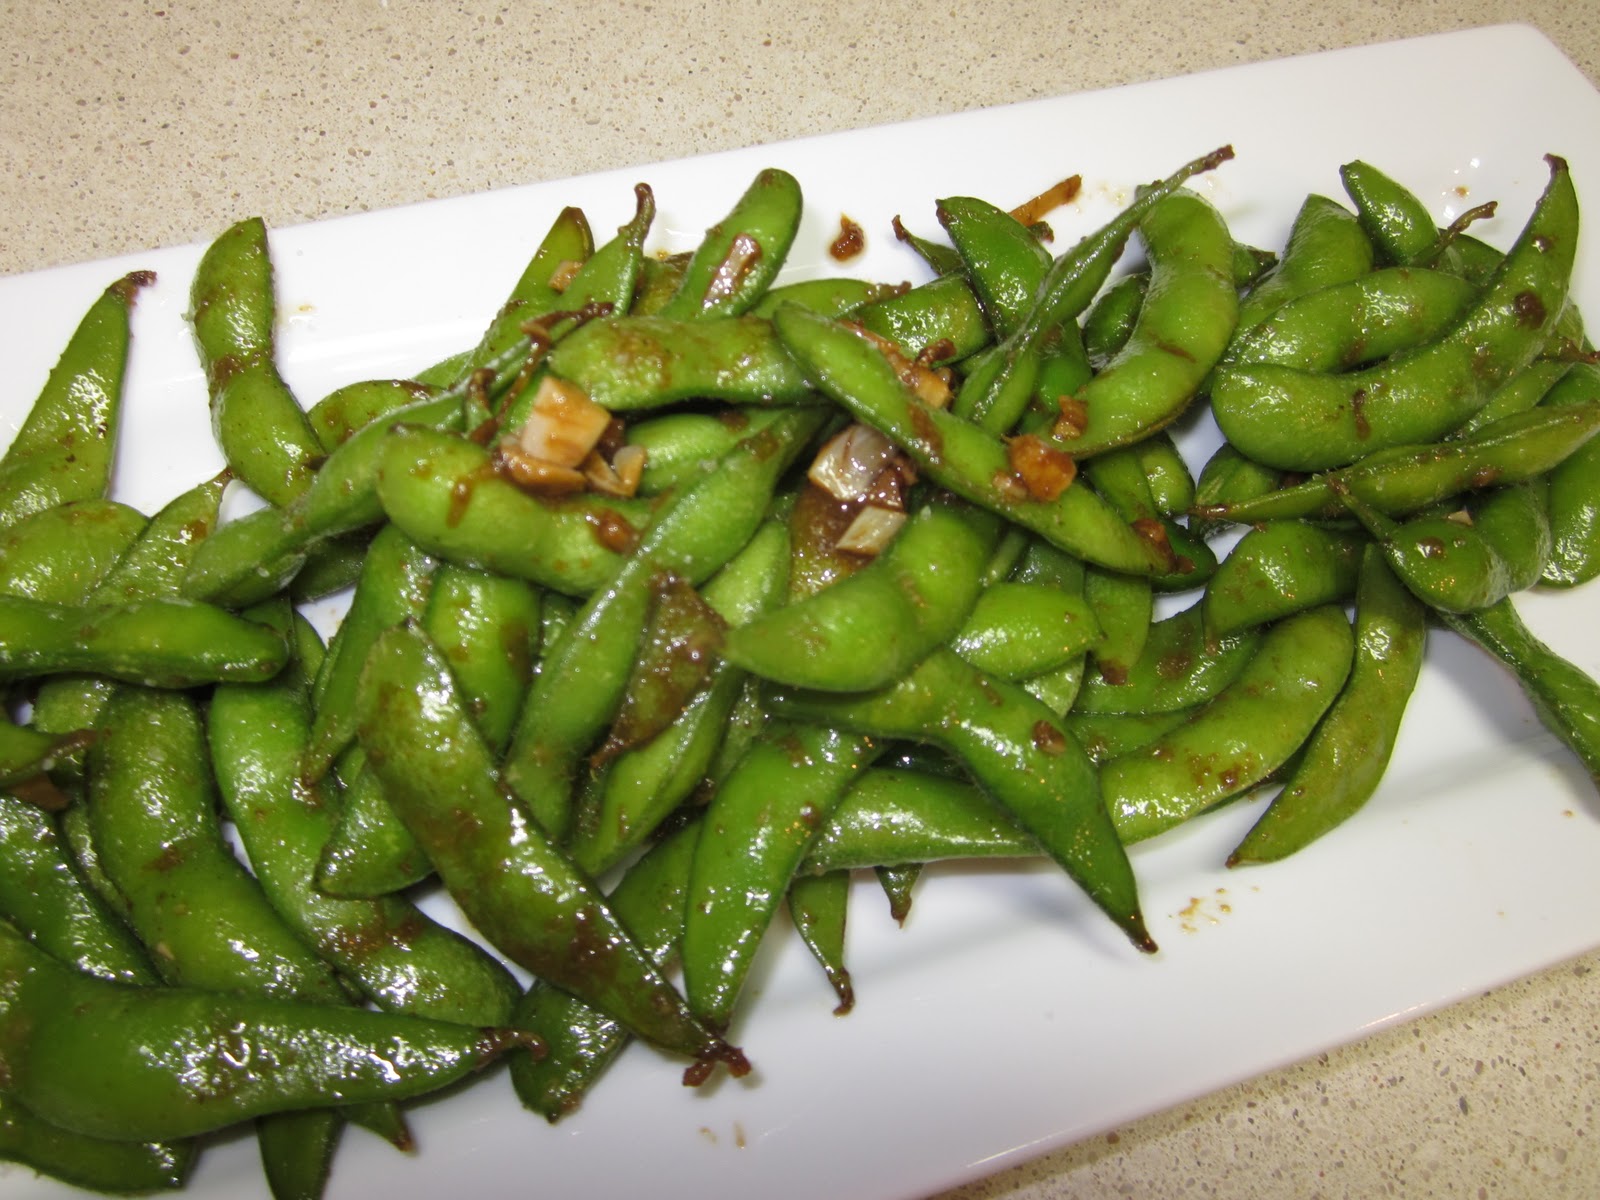
Roasted Garlic Edamame


One of our favorite sushi restaurants in Round Rock serves something very similar to this. We order it every time we go and pretty much lick the plate clean! Tonight we had an Asian-inspired meal so we had this for an appetizer. It was our first time to try to simulate what we order at the sushi restaurant and it turned out SO good! If you like regular edamame, you will LOVE this!! No need to dip each pod in soy sauce- the combination of the roasted garlic, teriyaki, and soy sauce is more than enough!

Ingredients:
- 1 bag of frozen edamame
- 4 cloves of garlic, finely chopped
- 2 teaspoons of olive oil
- 1 tablespoon of soy sauce
- 1 tablespoon of teriyaki sauce
- a sprinkle of garlic powder and sea salt

Directions:
1) Heat the olive oil on high in a skillet.
2) Steam the edamame in the microwave (follow directions on bag) for 3/4 of the time listed. Set aside.
3) Add the garlic to the pan and roast for a minute or two.
4) Add the soy sauce and teriyaki sauce- heat to high.
5) Add the edamame along with the garlic powder. Continue stirring until edamame is well coated and becomes a little bit crispy.
6) Remove from skillet and top with sea salt.
7) Voila!

  Get Cookin'!

Sunday, September 11, 2011

Barbecue Mexican Corn


My sweet mom and I share a love for cooking- and I get so excited when she sends me newspaper clipings of recipes to try. She sent me this and I just had to try it. I did not have an cotija cheese so I used grated parmesan. I was skeptical of the ingredients but the corn really had tons of flavor! I will definitely make this again.

Ingredients:
- 1/2 cup of fat free mayonnaise
- 1 teaspoon of barbecue spice rub (you can use any kind- I used Stubb's)
- 1/4 teaspoon of season-all (I used Tony's)
- 3 ears of corn, peeled
- 1/2 cup of grated parmesan cheese
- 2 tablespoons of chopped fresh cilantro
- 1 lime
- nonstick cooking spray

Directions:
1) Heat a grill (or you can use a grill pan) to high.
2) Mix together the mayo and seasonings and set aside.
3) Place the corn on the grill for about 5 minutes or so.
4) Remove the corn and spray with cooking oil or butter. Put the corn on a piece of foil and put back on the grill for another 5 minutes, or until tender.
5) Remove from grill once again brush on mayonnaise mixture. 
6) Sprinkle with cheese and cilantro.
7) Voila!

I cut all of the corn off the cob and then added a little more of the mayo mixture, cilantro, and cheese. 


  Get Cookin'!

Thursday, September 1, 2011

Sautéed Squash Medley


YUMMMM! That's all I can say about this. Oh, it's so good! Jason cooks this outside in a skillet (our grill has a burner attached to it) so it has a slight smokey flavor. You can see in the picture that the squash gets a little brown on the rim. This gives it a nice texture- sort of crispy but still soft.

Ingredients:
- 2 yellow squash, washed and cut into circles
- 1/2 sweet onion, diced
- 1 jalapeno, seeded and diced (save a few of the seeds to add in if you can handle a little heat)
- a few teaspoons of olive oil
- 1 tablespoon of butter
- garlic salt, pepper, Greek seasoning to taste

Directions:
1) Put the olive oil in a pan and heat up.
2) Add the onions and jalapeno and cook for a few minutes.
3) Add the squash, butter, and seasoning and cook down until squash softens. It's kind of the same concept as browning vegetables- except you don't cook the squash as long. No one wants to eat mushy squash!

This side dish is really easy and delish! Try it for yourself and watch your taste buds rejoice. :-)

     Get Cookin'!

Saturday, August 20, 2011

Parmesan Garlic Mashed Potatoes

I'm sad that I don't have a good picture of the mashed potatoes because they were so good! I made them with the Balsamic Grilled Chicken. Click here to see that recipe picture (you can sort of see the mashed potatoes).

In our house, we do alot of experimenting with potatoes. They are a pretty much a staple for every meal we cook! I think it's a Southern thing :-). We have 2 or 3 really great ways to make mashed potatoes and eventually I will share them all on here. Below is a newer one that we just love! I really want to cook this again and use freshly grated parmesan cheese instead of the Kraft kind. Either way it's quick, easy, and delish! This version tastes like something straight out of a fancy restaurant!

Ingredients:
- baby red potatoes
- butter
- heavy whipping cream
- parmesan cheese
- 2 garlic cloves
- salt and pepper to taste
- dried parsley flakes for presentation

Directions:
1) Boil the potatoes until soft.
2) Mash the potatoes.
3) Add a couple tablespoons of butter and a little bit of heavy whipping cream to make the potatoes creamy.
4) Mince the garlic cloves and add to the potatoes, along with a few good shakes of parmesan cheese.
5) Add salt and pepper, then taste and add more parmesan if necessary.
6) Sprinkle the parsley over the top of the mashed potatoes for presentation.
7) Voila!

      Get Cookin'!

Friday, July 22, 2011

Twice Baked Potatoes-ish

I added the "ish" to the end of the title of this post because that's my way of saying "close to" or "sort of." I like to use "ish" because I feel like it gives me the freedom and flexibility to do whatever I want! (Kind of like when I tell someone I'll be somewhere at 10:00ish, it means I will probably be there about 10:30. I am never, ever, ever on time for anything! But I'll save those stories for another time.) 

This is sort-of, a recipe for twice baked potatoes. This really turned out to be delish, but completely different than how I wanted it to turn out. 

***Important Note: If you want to make twice baked potatoes the right way-- you must, must, MUST bake the potatoes in the oven first.  It's the middle of summer and no one wants to have their oven blazing for hours in 105 degree heat! So I thought I would be smooth and cheat a little by "baking" the potatoes in the microwave for the first round. Well, as it turns out you must bake the potatoes in the oven because that's the only way the skin will get hard and crispy (enough to re-stuff). If you just microwave the potatoes, the skin is too flimsy and just falls apart. That is why my twice baked potatoes are not served in the original skin, but in a small ramekin. 

Darn it! I was so mad when I realized this! Not only do I want my food to taste delish- but I want it to LOOK delish, too! But...I decided to go with the flow on this one and the individual portions turned out to be ascetically pleasing. Thank goodness!

Directions:
1) Bake potatoes in the OVEN until fully cooked.
2) Cut potatoes in half and use a spoon to scoop out the potato-part, leaving the skin in one piece.
3) Put the meat (or whatever you call it?) of the potatoes in a bowl with lots of butter, bacon bits, green onions, pepper, Tony's, and a few squirts of ranch dressing.
4) Mash it altogether and stir in some cheese.
5) Stuff the potato skins with mixture and add cheese on top.
6) Bake for a few more minutes until the cheese is melted.
7) Top with extra bacon bits, green onions, etc.  
8) Voila!

"Never say 'Oops.' Always say 'Ahh, interesting!' " ---Author Unknown

     Get Cookin'!

Thursday, July 14, 2011

Smashed Hot Potatoes


I saw a version of this online and wanted to try it. At first I thought the potatoes would taste similar to my recipe for oven roasted potatoes, but really these were very different. What I liked most about them was their texture- the potatoes turn out to be a little crispy. The recipe calls for fresh herbs (either basil, thyme,  or rosemary), but I didn't have any of those. So I used the dried spices. I bet these would be way more flavorful with the fresh herbs. Still, I really liked these and the variation from my regular oven roasted potatoes. Delish and definitely worth trying!

Ingredients:
- whole baby red potatoes
- olive oil
- salt, pepper, garlic powder
- herbs of choice- I used thyme, basil, and parsley

Directions:
1) Boil the potatoes until they are soft (about 15-20 minutes).
2) Tear off a piece of foil and spray it with cooking spray.
3) Place the potatoes on the foil. Use a potato masher to gently press down on each potato until it slightly mashes. Rotate the potato masher 90 degrees and mash again.
4) Brush the tops of each smashed potato generously with olive oil.
5) Sprinkle potatoes with salt, pepper, garlic, and herbs.
6) Bake at 450 degrees until golden brown (about 20-25 minutes).
7) Voila!

Here is a closer picture of the potatoes- yummy!

    Get Cookin'! 

Tuesday, July 5, 2011

Cucumber and Cilantro Salad


This salad is so simple and refreshing! Traditional cucumber salad (sliced cucumbers with distilled vinegar, salt, and pepper) has become a staple side dish in Jason's family during the holidays.  In Cozumel, we had a delish version of a traditional cucumber salad.

Ingredients:
- cucumbers, thick sliced and then cut in halves
- fresh chopped cilantro
- rice vinegar (I use the toasted garlic flavor)
- Light Italian dressing
- salt and pepper to taste

Directions:
Mix everything together! haha. The longer the salad marinates, the better! I just "eye-balled" the amounts for the vinegar, italian dressing, and seasoning. You really don't need too much italian dressing- just a dash! The vinegar is sort of like the dressing for the salad- so you don't need to drench the cucumbers.

This really is so good- you should try it!

     Get Cookin'!

Thursday, June 2, 2011

Bacon Wrapped Jalapeno Poppers

If you like jalapenos, you will LOVE these! But before I go any further, I have to admit that I stole this creation idea from a friend- I know he won't mind me sharing! There is a little prep work involved in the process, but it's SO worth it!

1) Mix together the ingredients for the stuffing and set aside. The stuffing consists of:
     - a small block of cream cheese, softened
     - about 1/2 cup of shredded cheddar cheese
     - diced green onions

2) Wash the jalapenos. Cut off the top and use a butter knife to take the seeds out. To seed the jalapenos, carefully turn the knife around and around the inside of the pepper. The seeds will break free and you will be able to shake them out.Be careful not to split the jalapenos because the stuffing will ooze out. Here's a picture of how you should seed the peppers:

Here is a picture of what the seeded pepper should look like: (HINT: If there are a few seeds that are stuck on the inside, just wash them out with water. You really want to get all of the seeds out, or else these poppers will be too spicy to enjoy.)

3) After all the peppers are seeded, grill them for a few minutes until they turn a little black. 

4) Take the peppers off the grill. Use a small knife to stuff the peppers with the mixture. Wrap each pepper in bacon, covering the top of the pepper with an end of the bacon (this will help keep the mixture from oozing out all over the grill). Use a skewer to keep the bacon in place. We like to sprinkle a little pepper on the bacon before grilling- it really helps bring out the flavor!

5) Grill the poppers until the bacon is cooked, turning frequently. Here is a picture of the peppers right off the grill- they are still on the grill pan because we just couldn't wait to start eating them!


Try this and let me know what you think!

     Get Cookin'!

Saturday, May 28, 2011

Happy FRYday!

Ok, ok...I know it's Saturday! I wanted to post this yesterday but after a long day at school, cooking, and cleaning..I just fell asleep! Last night we fried some fresh, yellow squash and a sweet onion for an appetizer. We have done this before but I think this time was the best! We tried buttermilk (instead of regular milk) and a new batter- Vidalia Brand Sweet Onion. Buttermilk is a little bit thicker than regular milk, so the batter sticks to the vegetables a lot better. It looks like this:

We cut the squash and onion into rings, dipped them in buttermilk, and then into the batter mix. Note: This is not what it said to do in the directions on the back of the box! From experience, we have learned to just use milk and the batter mix, and we add some of our own seasoning to the mix. We fried them in a deep fryer at about 375 degrees for 7-10 minutes (or until golden brown). To make this tasty appetizer even more delish, we served it with a side of serrano pepper ranch dipping sauce! Oh, so good! 


     Get Cookin'!

Wednesday, May 25, 2011

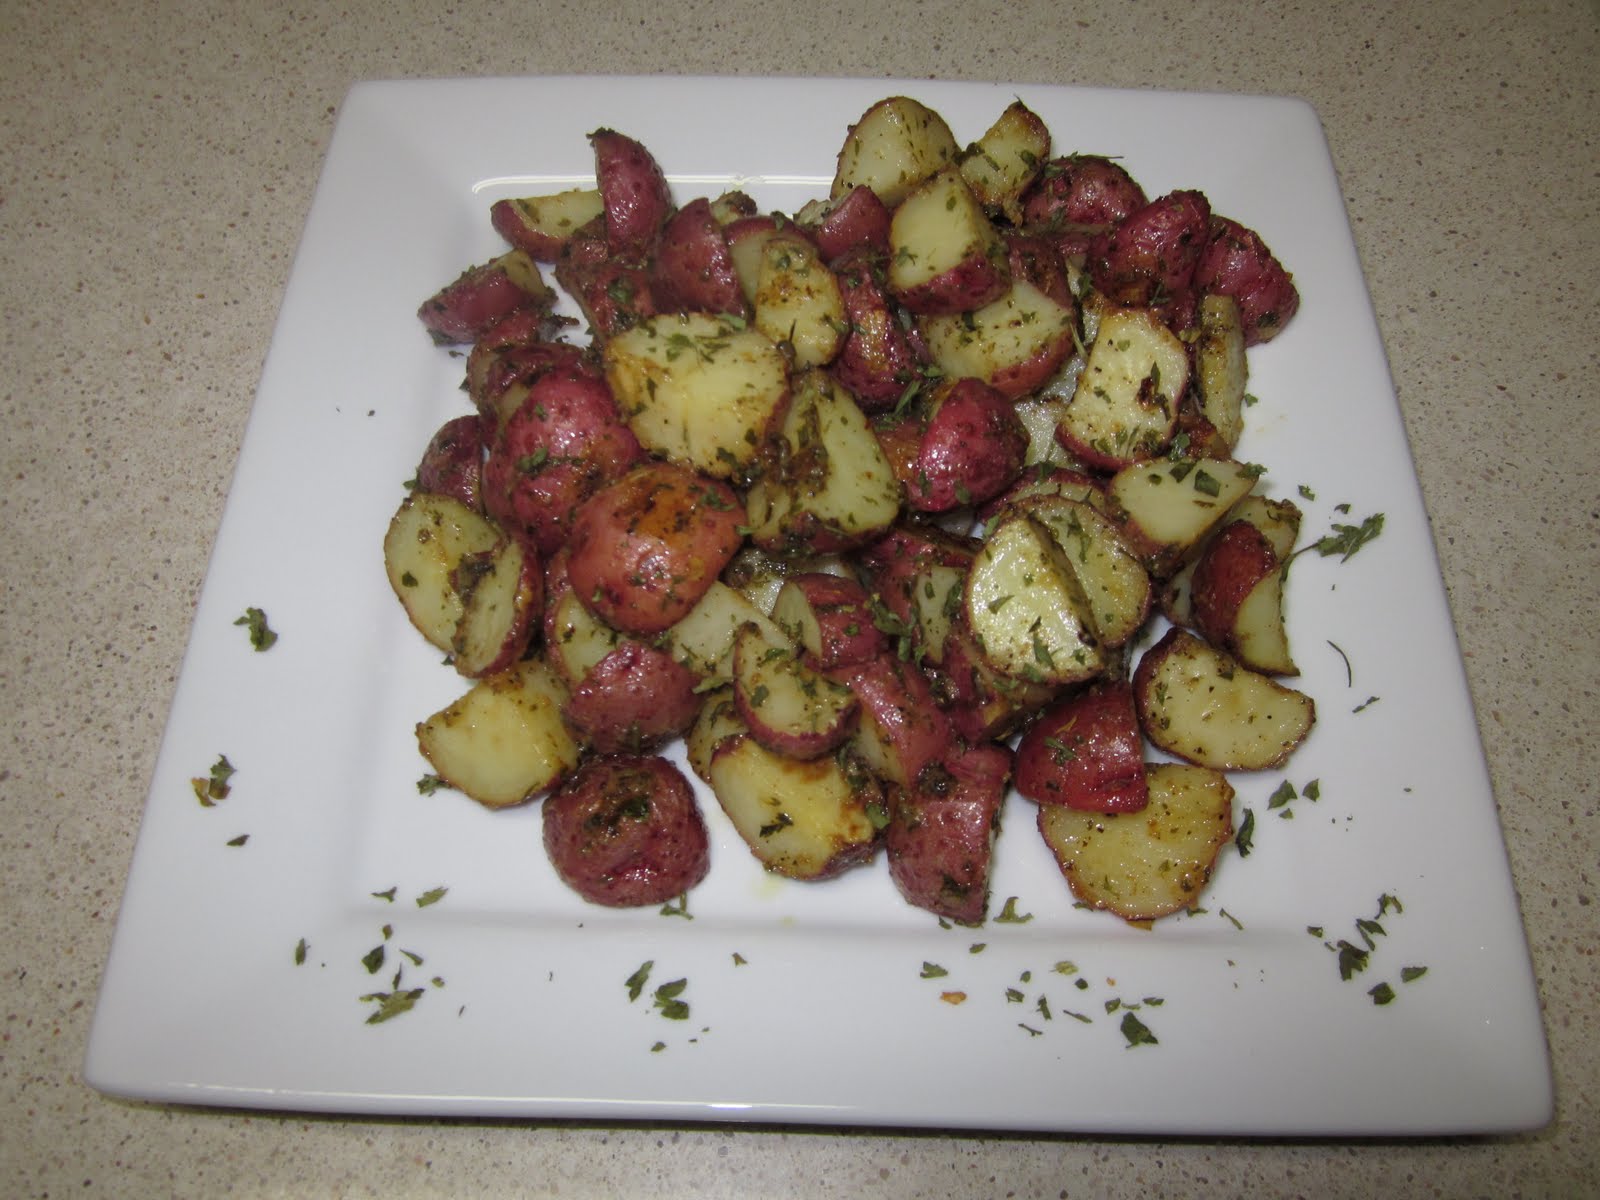
Oven Roasted Potatoes

Last year Jason and I were grilling some burgers and we wanted some fries to go with them, but we only had a few potatoes. So Jason had the genius idea of cutting up the potatoes, tossing them with a little bit of olive oil, adding a little seasoning, and baking them in the oven. The potatoes were simple but delish! Since then, we have experimented with different types of oven roasted potatoes. Below I've listed a few of my favorites.

I always use small red potatoes. I think they have the most flavor and are the easiest to cook.

Directions:
1) Preheat the oven to 400 degrees.
2) Wash the potatoes and dice them up (leave the skin on).
3) Put the diced potatoes in a gallon size Ziploc bag.
4) Add a few table spoons of olive oil in the bag and shake it to coat the potatoes.

Here's where the variety comes in. Just pour the seasoning mix in the Ziploc and shake! I don't use the whole package of seasoning because I'm only cooking for 2 people. But depending on how many potatoes you use and your taste preference, you might need to. I have used these as seasoning and both are great!


I tried the ranch seasoning on the potatoes today for the first time. Hint: I cover my baking sheet with foil and spray it with Pam (so I don't have to wash the baking sheet) ! Here are the potatoes before baking:

I baked them at 400 degrees for about 30-35 minutes. When I took the potatoes out of the oven, I sprayed them with a little butter before serving. Delish!

Instead of using the packaged seasoning mixes, I have also created my own seasoning. To be honest, I think I like this combination the best: Follow directions 1-4 from above, and then season the potatoes with garlic powder, Tony's, Greek Seasoning, black pepper, and thyme. I love, love, love these!!

I saw this online and I have been wanting to try it: bite sized potato skins! Cut the red potatoes in half, scoop some of the potato out of each half, and bake. Then top with shredded cheese, sour cream, bacon bits, and green onions. YUM! I'm going to try this soon. This would be great for a party appetizer!


Have you tried any variations of oven roasted potatoes? Share your ideas by posting a comment below!


      Get Cookin' !